
The gathering just isn’t full as I nonetheless have to supply a smaller model of the Japanese impressed fashion.
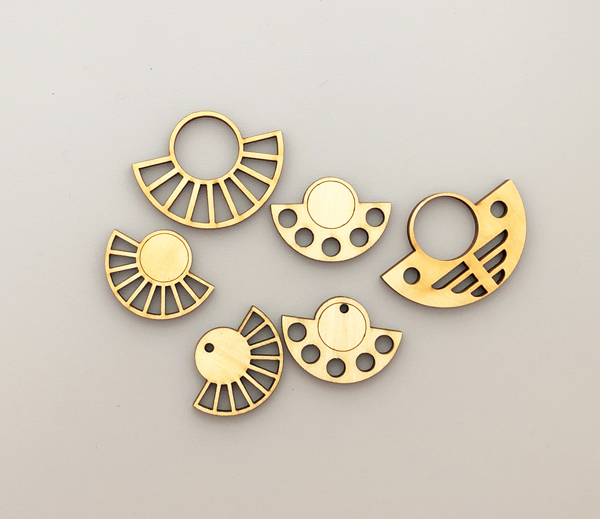
I added holes to the smaller variations so these can work as dangles.
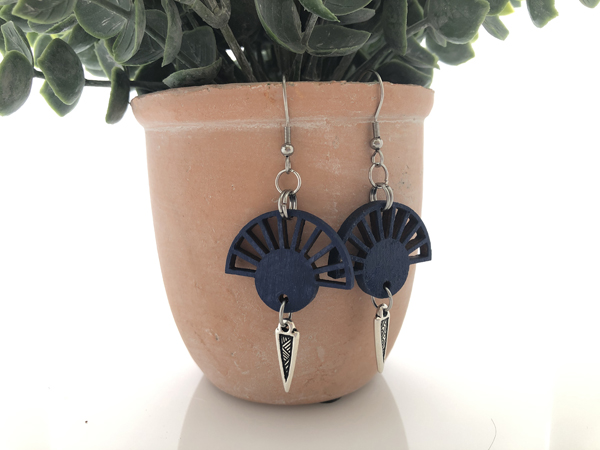
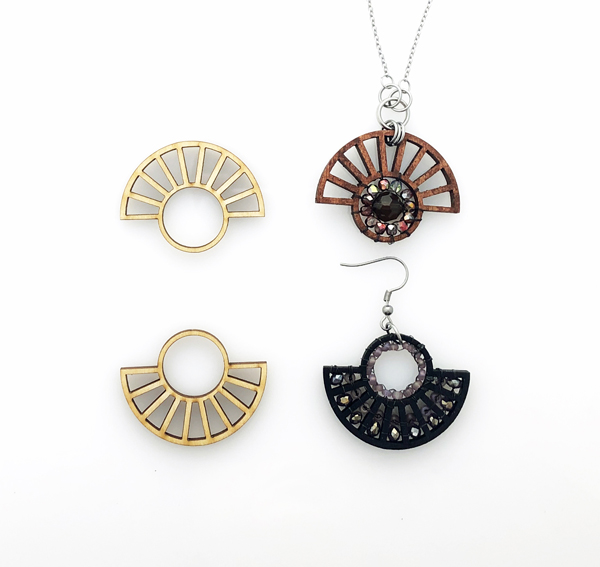
However flip them the wrong way up and they’ll look completely different! The holes grow to be alternatives so as to add dangles, charms and tassels. I used the beautiful Ethnic spike charms, courtesy of Tierracast!
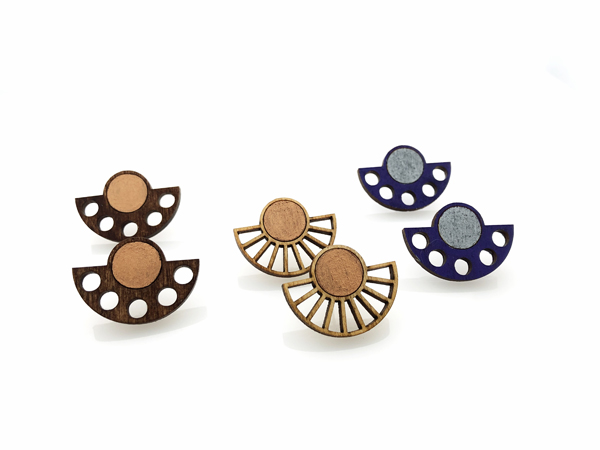
The big Japanese fashion ones are finest for assertion earrings. I like them in gold metallic paint. Very mild to put on.
The no-hole wooden followers make glorious stud earrings. The rating strains I added will provide help to paint. I used wooden stains, blue acrylic paint, silver and bronze metallic acrylic paint. The Sargent metallic acrylic paint assortment is very really helpful for high quality and protection.

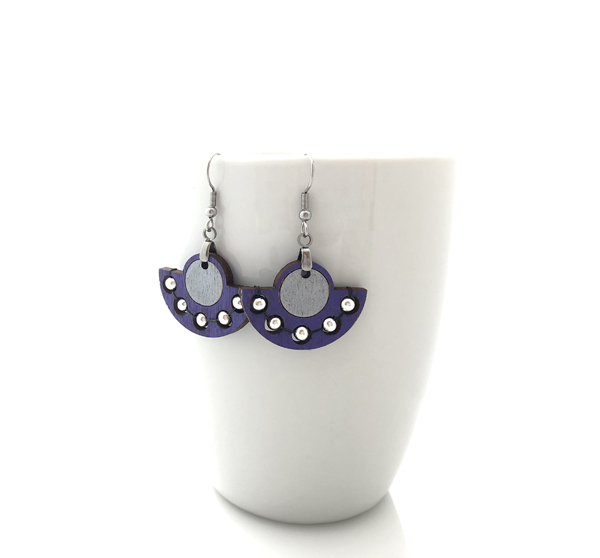
You may as well add beads to 2 of the design kinds. These turned out wanting like UFOs!
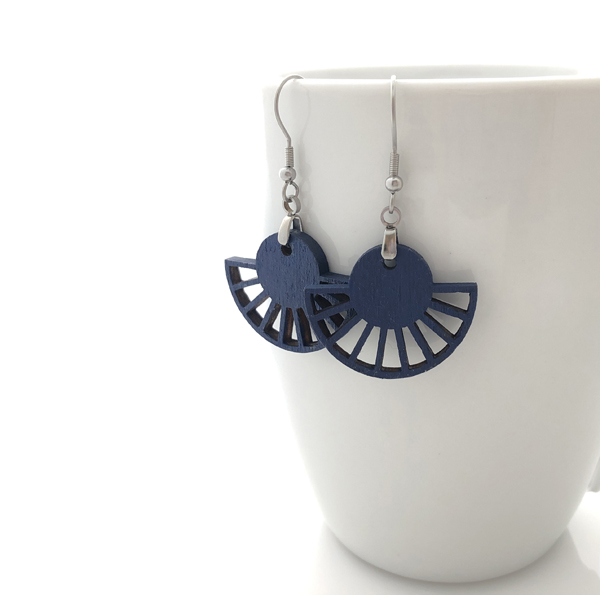
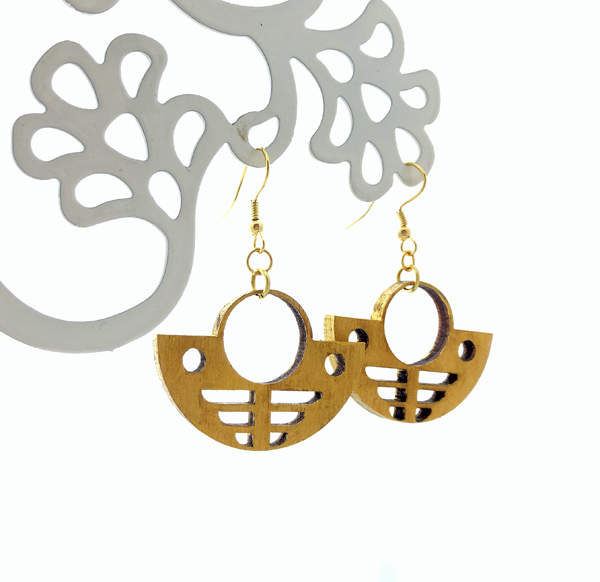
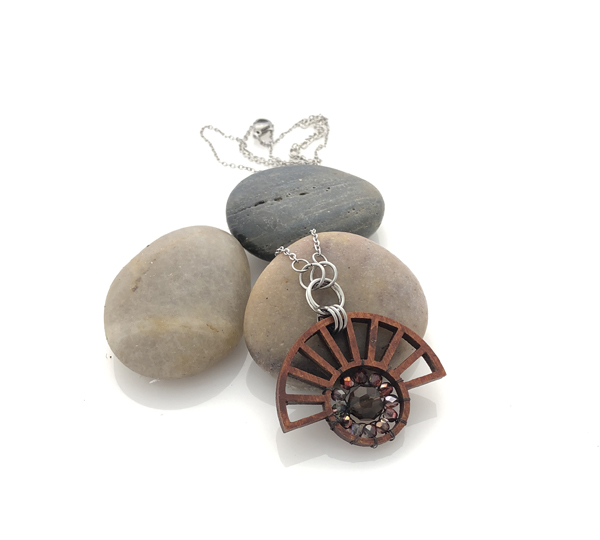
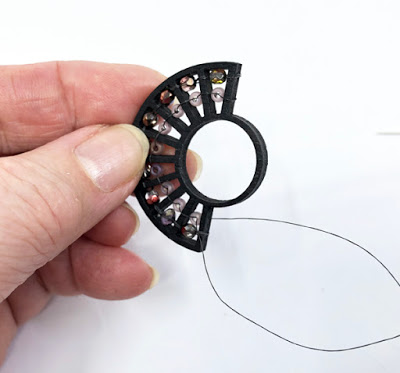
The half wheel kinds are essentially the most versatile. Once more, turning them the wrong way up provides them a special look. These are the bigger ones which can be utilized as assertion earrings or pendants.
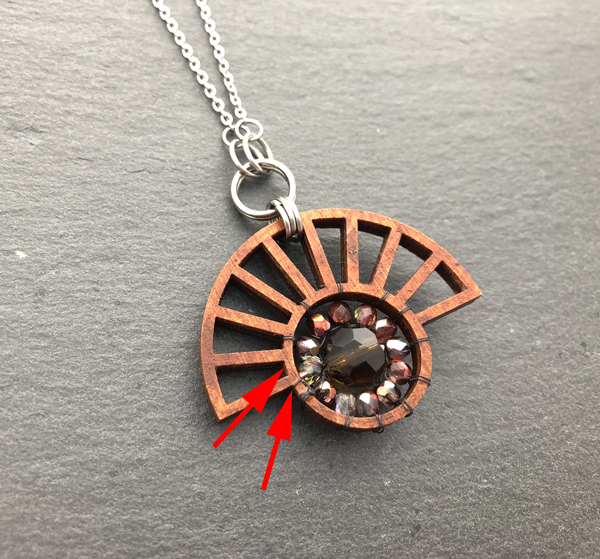
I believe I see an Aztec fashion when the body is this manner spherical and beaded within the round space!
TUTORIAL
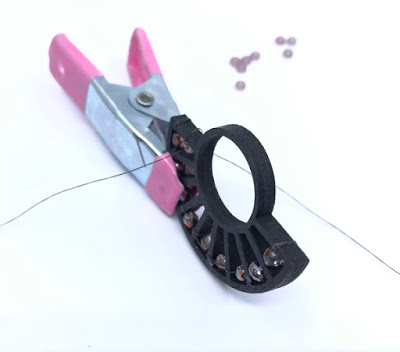
I like to recommend you employ beading methods so as to add the beads. It’s too awkward to maneuver wire out and in of the gaps. The half-wheel fan frames are additionally too fragile to face up to the tightening of wire wraps.
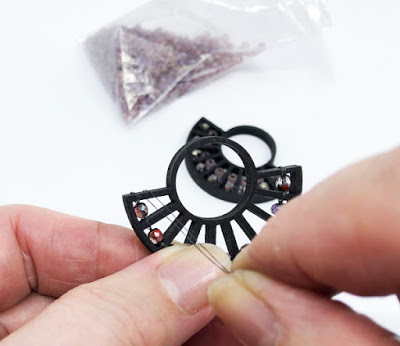
1. Mandala Fashion Beading
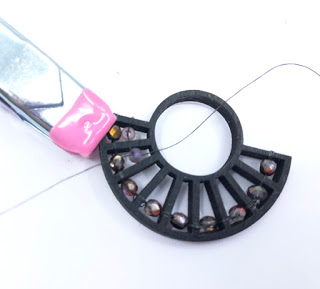
Simply use a modified brick sew, incorporating the wooden body, so as to add beads across the open circle of the half wheel tribal fan elements. Watch the way you area the place the Fireline goes within the gaps in order that the ultimate result’s even. What you do is determined by the dimensions of beads you select.
The purple arrows present the place my thread was and will have been for symmetrical spacing.
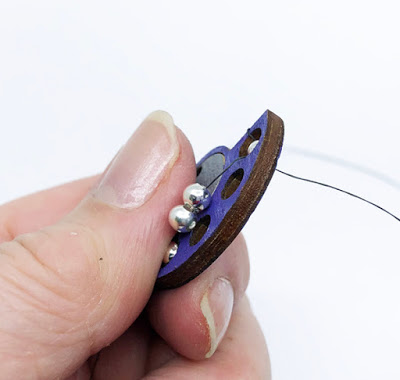
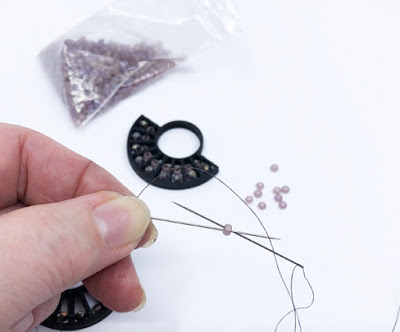
2. Including Beads with out Bead Holes Exhibiting
I used about 2-Three ft of Fireline and a beading needle – don’t use lengthy ones. Add a stopper bead after which string alongside sufficient beads of the proper dimension to fill the areas.
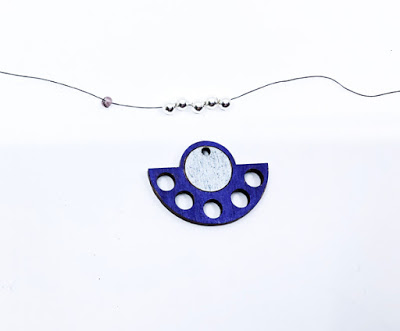
Lay the beads out.
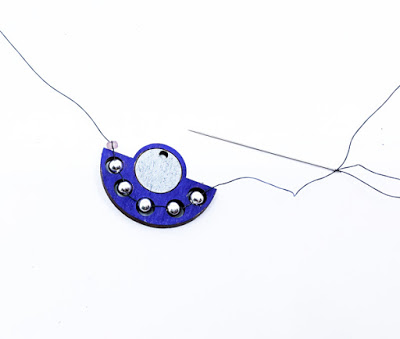
Wrap the Fireline from the entrance to the again of the body. Carry the needle from the again to the entrance and undergo the final strung bead.
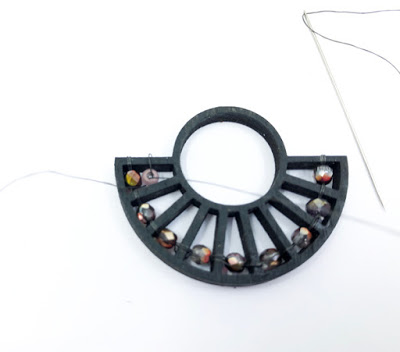
Poke the needle to the again of the body, then convey it as much as the entrance on the subsequent gap.
Undergo the subsequent bead. Then take the needle by to the again once more.
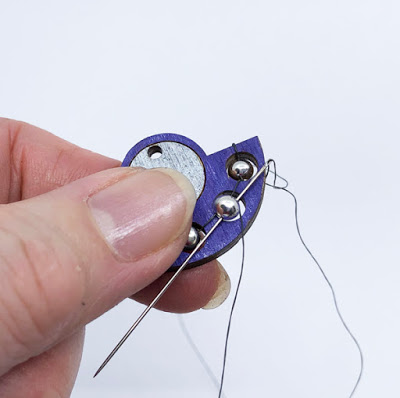
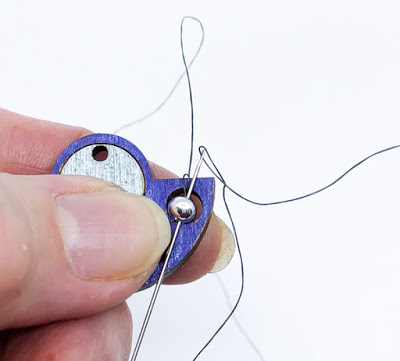
Repeat till you get to the left aspect of the body. Wrap the thread across the body and are available up earlier than the primary strung bead. Now sew by all of the beads. You’ll discover there are actually two threads exhibiting on the entrance.
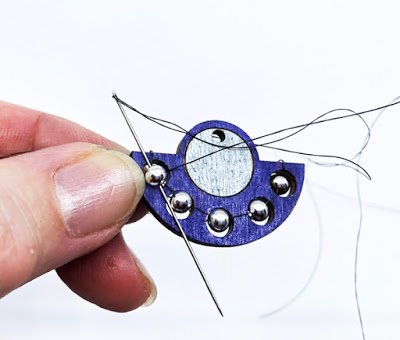
While you get to the final strung bead, wrap across the body and convey the needle from the again to the entrance. Then undergo that bead and take the needle to the again.
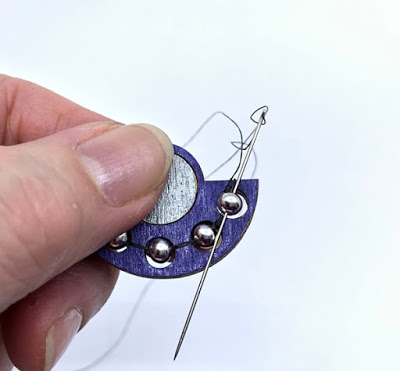
Flip the body to the again and stitch by all of the beads. It will go away you with two threads exhibiting on the wooden all alongside. Make certain the threads are all tight earlier than ending up every finish of the thread with half hitches. Dot with a little bit of glue and reduce the thread ends off.
Three. Including Beads with Holes Going through Up
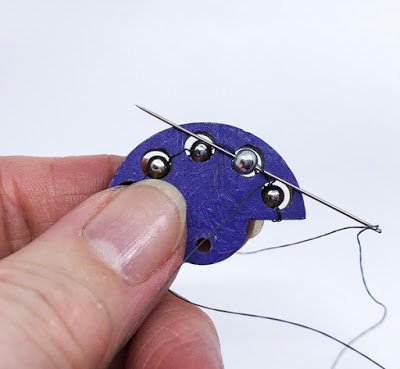
I discovered it’s a lot faster so as to add beads with holes going through up utilizing the dual needle technique. Lower a 2-Three ft size of Fireline. Wrap the thread across the left a part of the body at in regards to the mid level. Add beading needles to each ends.
Take every needle and cross by the seed bead from reverse instructions.
Place the bead into place with the outlet up. Each threads are on the entrance of the work at this stage.
Take the proper needle and feed it to the again :
While you decide up the subsequent bead, the threads will bracket the wooden spoke.
Proceed with the dual needle technique so as to add the beads till you attain the opposite aspect of the body.
Cross the threads on the fringe of the body after which twin needle it again to the start. Wrap round that finish and fasten off with half hitches. A contact of glue and trim off the thread ends.
Pictures
I used my iPhone eight+ for ultimate product images in pure mild. I used the Orangemonkie studio which comes outfitted with LED lights – for synthetic mild images in my windowless basement studio. The Foldio2 Plus is superb . I exploit the Foldio3 with the additional mild bar as a result of I want the room for tutorial images. Take a look at my The best way to Photograph Jewellery Webinar .join the notification so I can let you understand when my book is prepared.
Earlier than You Go :
Disclosure
This weblog could comprise affiliate hyperlinks. I do obtain a small price for any merchandise bought by affiliate hyperlinks. This goes in direction of the help of this weblog and to offer useful resource info to readers. The opinions expressed are solely my very own. They might be the identical whether or not or not I obtain any compensation.
______________________________
Unique Submit by THE BEADING GEM
Jewellery Making Ideas – Wire JewelryTips -Jewellery Enterprise Ideas


